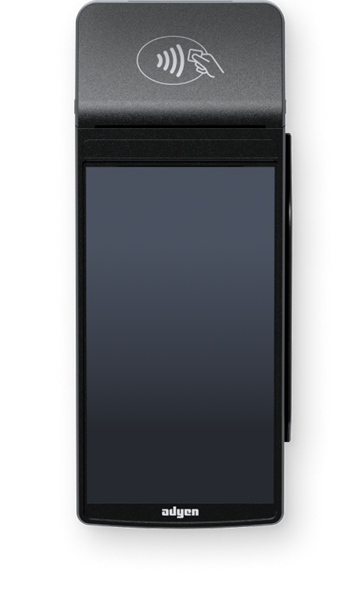
USER GUIDE FOR S1F2 TERMINALS
A handy guide to understand your terminal better
 Good to know:
- Leave the terminal on at all times, this way it will automatically update when needed (this happens mostly during the night)
- Terminals can be used as stand-alone, or integrated. Please contact SmartHotel to discuss the options that are applicable for you
- Your passcode for the terminal you have received from SmartHotel. In case you have misplaced them, feel free to contact us.
- In order to change the thermos-rolls, please carefully open the container with fingers placed on both sides. You do not need to use a lot of force. You must order the thermal rolls yourself. The correct dimensions are 57x40x12 and 48 grams. Of course you can also order these via SmartHOTEL.
Connect to your network
Connect your terminal to the internet so that it can communicate with the Adyen payments platform and your own back-end systems.
Connect to Wi-Fi
- After selecting your language on the Welcome screen, select the arrow button:
- On the Setup Wi-Fi screen, select the + sign.
- Turn on the WLAN toggle switch.
- Select a Wi-Fi network from the list, or select the + sign and add the name (SSID) of the Wi-Fi network.
- Enter the Wi-Fi password.
- Select OK.
The terminal sets the network as default automatically, and connects to it.
You'll now see a Wi-Fi icon at the top of the display.
Updating the connection settings
If you need to change Wi-Fi usage later:
- Select Settings > Network.
- Enter your passcode.
- Select Wi-Fi. You can now:
- Turn Wi-Fi on or off using the WLAN toggle switch.
- Add another network as described above.
Cellular 4G failover
Your S1F2 terminal can automatically switch to processing payments using a cellular connection when the internet connection fails.
Turn on/off
If you turn on the payment terminal for the first time or after it was off for a long time, it may make a maintenance call to synchronize the configuration and update the software. This can take 10 to 20 minutes.
When connected to a power supply, the battery charges. An icon at the top of the display indicates the battery charge level.
Turn on the terminal:
- Press and hold the power button until the display turns on. If necessary, connect the terminal to a power supply to charge the battery.
Turn off the terminal:
- Press and hold the power button until a dialog box appears, then confirm you want to turn off the terminal.
Use the USB-C charging cable
The S1F2 payment terminal is supplied with a USB-C charging cable and a region-specific power plug. This cable is compliant with the USB industry and UL standards.
Always use the charging cable and the region-specific power plug provided.
To prevent damage to the USB-C charging cable and the USB-C socket on the payment terminal, follow these guidelines:
- Insert and remove the USB-C charging cable by holding the end that connects to the terminal or the power plug.
- Don't insert or remove the USB-C charging cable in an upward, downward, left, or right direction.
- Don't bend or fold the USB-C charging cable.
- Don't use excessive force to insert or remove the USB-C charging cable.
- Always inspect the USB-C charging cable and the USB-C socket on the payment terminal for foreign objects.
- If the terminal operates in areas of high humidity, dust, or food residue, consider getting a charging station.
Payment terminal menus
Your payment terminals have a menu with options related to payments, and a menu with options related to configuration. The access to some menu options is protected by passcodes.
|
Menu/Button |
Description |
Passcode |
|
|
|
Admin & Settings passcode:
|
|
|
|
Transactions passcode required:
passcode required:
|
|
|
|
No passcode required. |
You have received the passcode from Smarthotel.
View, print, and reset totals
The terminal can generate a Totals report. This gives an overview of the total amounts for sales, refunds, gratuities (tips), and cancellations that the terminal processed since the last reset of the report. By resetting the report, you can use this functionality to get day totals or shift totals.
To obtain the Totals report:
- Select Transactions > Totals.
- Enter the Transactions menu passcode.
- You can now:
- View a Totals report for the period shown at the top of the report.
- Print the Totals report by selecting the print button:
- Start a new reporting period by selecting the reset button:
The totals from the previous period are no longer shown.
Standalone solution
If you will be using the payment terminal as a standalone terminal, transactions are not initiated from a PMS/POS system. Instead, you start transactions using the Payment button.
Refer to Standalone terminals for instructions on how to make payments, cancel payments, issue refunds, and (when needed) manually enter card details to make a payment.
For more information, please contact Smarthotel via support@smarthotel.nl
